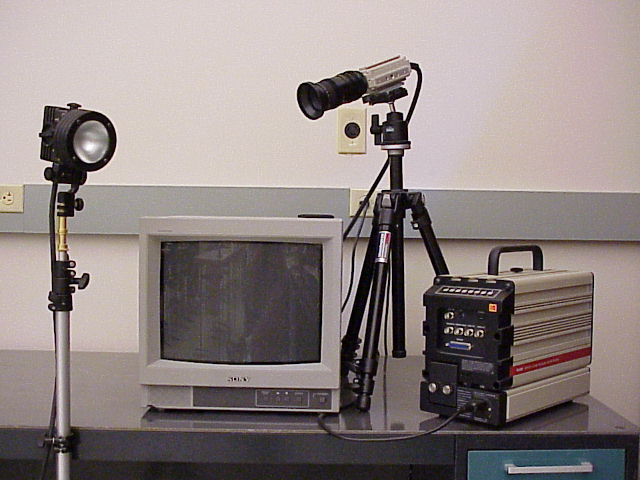
- model: Kodak Motion Corder Analyzer PS-110 (with RGB CCD)
- max frame rate: 10,000
- maximum pixel rate: > 60,000,000 pixels/sec
- typical configuration: 1,000 frames/sec at 256×240 pixels
- user/reference manual
Monitor
- Plug into outlet.
- Coaxial cable from Video In to Video Out on back of Corder.
Light
Camera
- Thick cable into Camera connector on back of Corder.
Corder
- Plug into outlet.
- Coaxial cable from Video Out on backside to Video In of monitor.
- Turn the monitor and Corder on.
- Using the mode button, make sure you are in “Live” mode.
- Zoom, focus, and play with aperture on the lens (you will need the light, trust me).
- The default aperture time is usually suitable, but it can be adjusted with the up and down arrows while in Live mode.
- When ready to record, hit the “Record Ready” button.
- The default setting for the camera is to record about two seconds of video after the trigger button is pressed. When in “Endless” mode, the camera is constantly recording, and when the trigger button is pressed, the previous two seconds are stored.
- Hit the trigger button and have at it.
- Using mode button, switch to “Play” mode.
- Pressing the play button once starts the playback.
When clip is playing:
- “Play” reverses play direction.
- Up and Down arrows increase and decrease frame playback rate.
- “Stop” button pauses and enters “Step” mode.
- In step mode, the Up and Down arrows step frame-by-frame.
- In step mode, pressing the “Stop” button again stops completely,
- Pressing “Stop” again returns to the beginning of the clip.
Full screen with no text:
- “Live” mode | “Menu” | “Display Off” | “Zoom On”
- When in “Live” mode, hit the “Menu” button.
- Use the Up and Down arrows to highlight options.
- Hit the “Menu” button to select options.
- When done, hit the Escape button to exit menu.

